Modifying access permissions
Path: ProjectView> Security> double-click UserGroups > Authorization Settings column
Click the button: a dialog appears with a list of widgets and actions. You can modify access permissions for each one in the list.
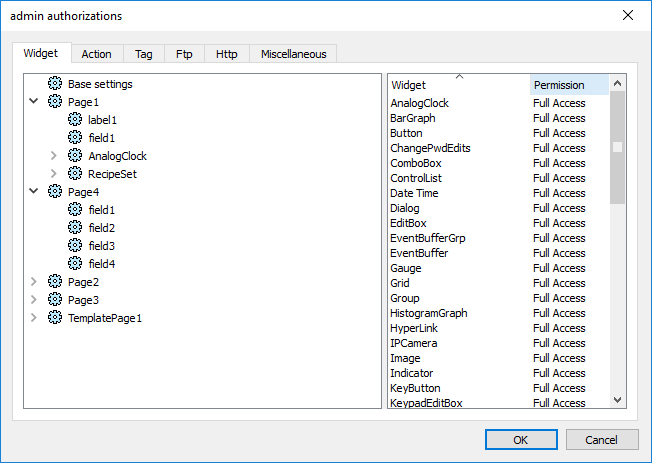
Widget permissions
In the Widget tab you can define widget access options at project level, at page level or at widget level for all the widgets used in the project. Lower levels permission (for example, widget level) overrides higher levels (that is, page and project levels).
Use Base settings to set default permissions at project level.
Possible settings are:
- Full Access to enable read/write access to the widget
- Read Only to enable readonly access to the widget
- Hide to hide widget for selected group
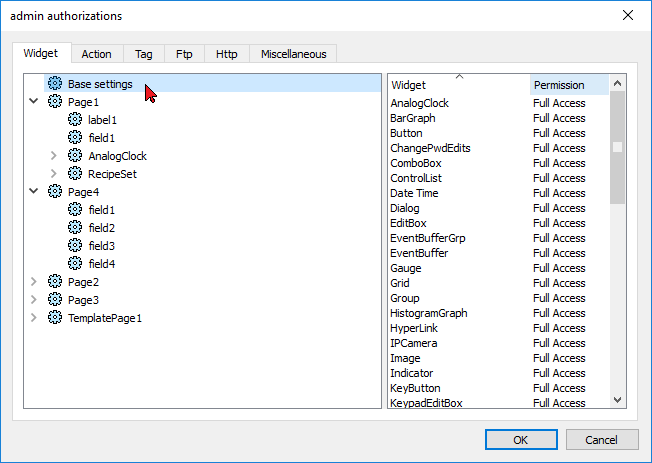
Changing a widget permission
To change access permission for an individual widget in a page of the project, navigate to that widget within its page on the right pane and customize its access options. Otherwise, all widgets take the permissions set at project or page level.
For example, if page permission for a widget is set at project level to Read Only, then all the same widgets will have permission Read Only. When you select a widget inside a page from the tree structure, permission is actually set to Use Base Settings. You can change this setting and modify access permissions only for this widget in this page.
Access priority
Widget permissions are considered with the following priority:
| Permission level | Priority |
|---|---|
| Project level - Basic settings | Low |
| Page level | Medium |
| Widget level | High |
This allows you to specify exceptions for an action or a widget directly from the page view.
For example, if you set permissions for a widget at project level to Read Only and to Full Access at page level then the page level settings will prevail.
Access permissions can be modified directly from the project page. See "Assigning widget permissions from page view" for details.
Action permissions
In the Action tab you can define action authorizations at project level, at page level or at widget level. Actions can be either Allowed or Not Allowed.

Action permissions can be modified directly from the project page. See "Assigning widget permissions from page view" for details.
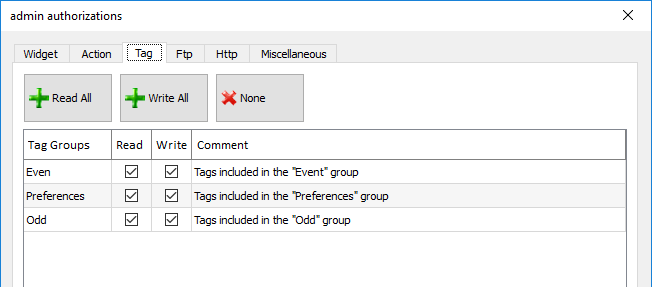
Tag permissions
For each group of tags, you can define the Read/Write access rights
FTP authorizations
In the Ftp tab you can set specific authorizations for the FTP server.
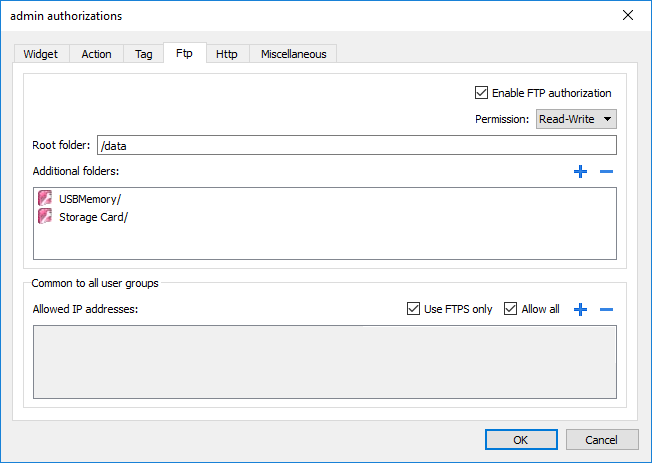
| Element | Description |
|---|---|
| Enable FTP authorization | Enables the FTP function for the specific group |
| Permission |
Type of permission:
|
| Root Folder | Folder to be used as root for FTP access. This is a relative path. |
| Additional folder | Extra folders to be used as root for FTP access (for example, on USB drive or SD card) |
| Allowed IP Addresses |
List of IP addresses from which FTP connection can be accepted. This setting is common to all users groups. |
| Use FTPS only | You can disable this flag if you need to use an old FTP client that does not support encrypted FTP mode, but please note that this is not a secure connection and all your data (even your password) are sent in the clear over the Internet. |
HTTP authorizations
In the HTTP tab you set restrictions to HTTP access to the web server integrated in JMobile HMI Runtime.
Wildcards can be used to identify a range of IP addresses.
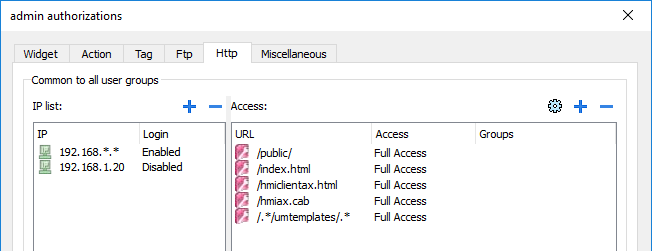
For example, the two following rules set the HMI device unit can only be accessed by all the IP addresses 192.168.*.* on your local network in which only the IP address of 192.168.1.20 can access the device without entering a login name.
| Element | Description |
|---|---|
| IP list |
IP addresses authorized to access the HTTP server. By default the login is required from any IP address (IP=.*, Login=Enabled). |
| Login | When disabled, the username and password are not required. |
| Access limits | List of resources for which access is limited |
Effect of these settings depends on whether the option Force Remote Login has been selected. See "Force remote login" for details.
|
Force Remote Login |
Default Access to workspace |
Access limits |
|---|---|---|
|
- |
Full |
- |
|
Disable |
Full |
Can be used to block access to some files/folders or to require authorization |
|
Enable |
No Access |
Can be used to open access to files/folders |
Important: This setting is common to all users groups.
Adding an HTTP configuration
To add and configure a new access click +: the Access limits dialog is displayed.
To restore the default configuration click the Set default access limits icon. Default configuration allows access to the following:
- PUBLIC folder and Index.html
Miscellaneous settings
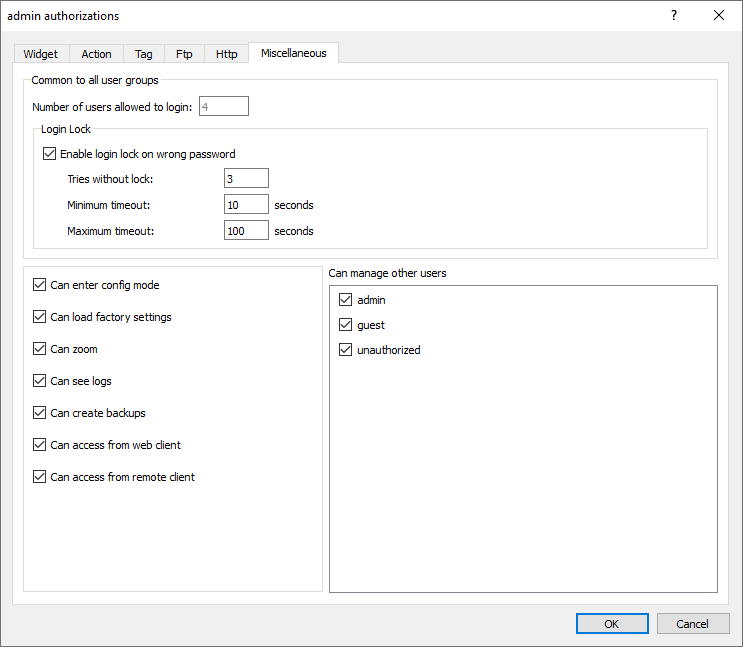
In the Miscellaneous tab you can define various authorization settings.
| Option | Description | |||
|---|---|---|---|---|
|
Number of users allowed to login |
Maximum number of users that can be connected to the HMI Runtime at the same time. This setting is common to all users groups. |
|||
| Login Lock |
Option to prevent “brute force” attacks. When "Enable access lock on bad password" is selected after the number of bad passwords allowed has been exceeded, the system will introduce a delay between one password and another in order to prevent a possible brute force attack. It is possible to define:
Timeout uses an exponential growth. Example of usage
|
|||
|
Can enter config mode |
Enables switching from runtime to configuration mode. Normally used for maintenance. |
|||
|
Can load factory settings |
Restores factory settings. |
|||
|
Can zoom |
Enables zoom in/out in context menu at runtime |
|||
|
Can see log |
Allows user to see logs at runtime |
|||
|
Can create backup |
Allows user to backup project. |
|||
| Can access from web client | Enables connecting from a web client | |||
| Can access from remote client | Enables connecting from HMI Client | |||
|
Can manage other users |
Gives super user privileges at runtime to manage the select groups. Allows adding, deleting and modifying users' permissions. |